

There's nothing I love more than a cute binder cover! While there are some awesome websites where you can just type in what you want and they'll pop out with a cute binder cover, I prefer making my own. You can personalize every detail and make it to your liking!
What I used
- Microsoft Publisher: This is how I met my binder covers. I know how to use Publisher well, which is why I chose Publisher. You could also use Photoshop or another similar program.
- DaFont.com: When I was in yearbook in middle school, our adviser recommended this website that is known for being virus free! As always, do use caution when downloading anything to your computer.
- Google Images and Pinterest: To find my favorite prints to use as the background!
1.) Pick your fonts!

Download here:
All these fonts are free for personal use. For commercial use, check out link's information.
These are some of my favorite fonts to use! My personal favorite for binder covers (and in general) is KG Eyes Wide Open. I have all these fonts downloaded to my computer to use for making birthday cards for friends, school projects and for fun! I love fonts. You can download some of all of these to create your binder covers with. (For how to download fonts onto your computer, check this or this out!)
2.) Pick your background image! Whatever pattern you're using, find it on Google. Here are my tricks to finding the perfect wallpaper.
- Use high quality, large images to decrease blurriness.
- Find patterns that repeat, and if needed, you'll be able to connect two images together to make it look like one. (Does that make sense? More on that later!)
- If preferred, think about what colors go with your binder's colors.
- When saving the image, open the image in a new tab to save the full version, not the smaller version.
- For Lilly prints, I love this website! (Click on the image to enlarge it!)
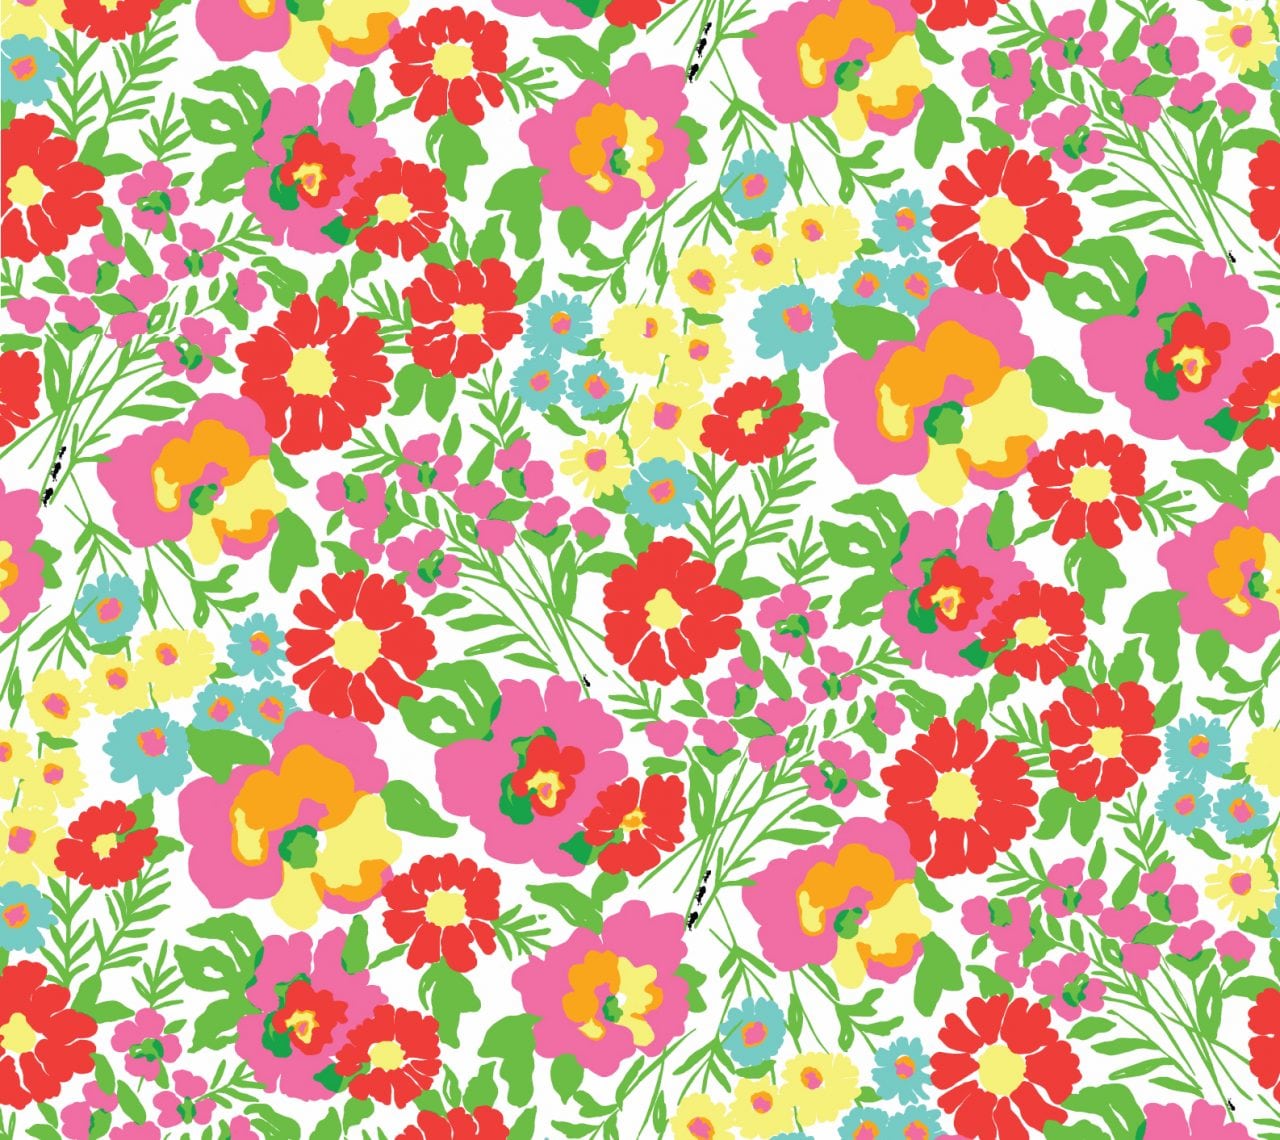
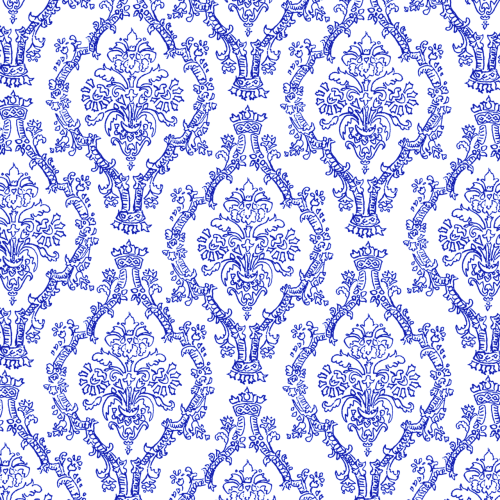
Here are some of my favorite wallpaper prints:
Note: if you like these prints, go to the link and save them there to get the higher quality images.
 |
| via |
 |
| via |
 |
| via |
 |
| via |
3.) Open your document. Go to Microsoft Publisher. (This is just what I used, if you know how to use another similar program, go for it!) Open to Blank Page Sizes and under Standard, click on A4 (Portrait). Then go to the Layout tab and change the Layout Guides. I change my Margin Guides to: Left, Right and Top to 0.287" and the Bottom to 0.487".

4.) Add image. Then insert your image to the document. If it doesn't take up the space of the entire document, that's okay! No need to enlarge it to fit the into page, which decreases the quality.

Instead copy and paste the image, so it's the exact size and reposition it so it matches the photo next to it. You may have to scoot the image up to overlap the previous image to get it to appear as one giant image. After I think I've got it, I turn off "Boundaries and Guides" (found under the View tab) to check. Zooming in the image can also help make sure you've got it matched perfectly.
If needed, repeat a third time until you've got it covering the entire page. If any part of any image goes over the page, just crop it so it ends at the page.
5.) Combine it into one image. Once you've got the image just the way you like it, hold down your mouse and go over all the images. You should get this button on your screen once you've done so. Click on it and all the separate images will combine into one!

6.) Depending on how you want your text to be, there are several different options...
- You can have the semi transparent option. The background is still there, but it's more transparent. (Option 7a)

- You can have the white option. (Option 7b)

7a) For the semi transparent background option for where the font is. Copy and paste two of the giant image you have, and put it on the side of your screen. For the original image (image A) you have, crop it so you only have the top part that is the image. You should only have a tiny part of print at the top of your page. (To crop the image, you'll need to undo the "combine images button," click it to undo and delete the other images and crop the top one. Your end result should similar to this. (Part A)

Take your second copy and pasted full size image, and do the same thing, except crop part A and the bottom part, leaving a space for your text. To ensure that you get your cropping correct, lay image B over your cropped image A and crop it to the space for the lightened area for the text. (Part B)

Next take this image and edit its color. I usually start with the "Washout" effect, fading the color greatly. Then I play with the brightness and contrast settings until I like it. (I typically turn down the brightness and turn up the contrast.) Here is how mine looked after:

Finally take your last full sized image, and crop Parts A and B out of image C and add it to the binder cover. Your image should look similar to this.

Finally! Now add your textbook over the "transparent" part and add your text. If you'd like, you can combine all of this as one image to make sure nothing moves.

If you'd like to add lines above and below your text, insert an image and go to "Autoshapes," and under "Connectors," pick the line. While drawing your line, hold the "Shift" key to make it straight. After changing its width to your preference, copy & paste that line to use as your second line. Here is what mine looked like:

7b) For a white background, insert a text box where you'd like the white background. Pick the fill color as white. It should look like this.

Create another text box covering the white text box and enter your text. Mine looked like this:

If you'd like to add lines above and below your text, insert an image and go to "Autoshapes," and under "Connectors," pick the line. While drawing your line, hold the "Shift" key to make it straight. After changing its width to your preference, copy & paste that line to use as your second line. Here is what mine looked like:

And there you have it! A gorgeous binder cover personalized down to the details. All your friends will be asking where you got that and if you can make them one.
And for the giveaway... if this tutorial is too much work, I'll happily make you a binder cover! You give me all the details and I'll make it for you! Here's what you have to do to enter:
- Follow me on Google Friend Connect or Bloglovin'. Leave a comment on this post.
- For an extra entry, follow me on Pinterest! Leave your Pinterest username in your comment, so I know!
- For an extra entry, follow me on Twitter! Leave your Twitter username in your comment, so I know! (@preppyncblog)
- For an extra entry, follow me on Instagram. Leave your Twitter username in your comment, so I know! (@preppync)

Make any amazing binder covers? Tweet me photos @preppyncblog or tag me in your Instagram photo @preppync.
Love the binders! They are so cute!
ReplyDelete